background

Monday, December 19, 2011

THIS WEEK'S CRAVINGS #60 (Christmas Dinner & Food Traditions) and Wedge Salad with Come Back Sauce

THIS WEEK'S CRAVINGS Linky Party
CHRISTMAS DINNER and FOOD TRADITIONS
Wedge Salad with Come Back Sauce


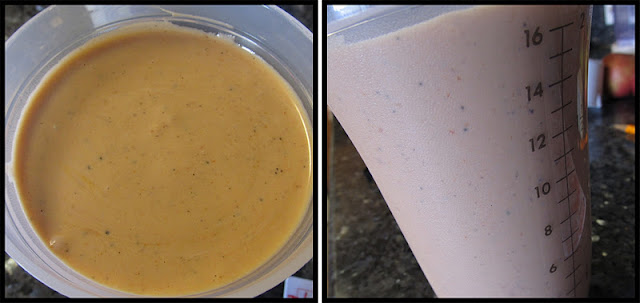
I am starting to LOVE wedge salads! It's my "newest" favorite salad. And it's SO SO easy to make, it's all in this wonderful salad dressing! I just decided today that this is going to be our salad for Christmas Eve. I made this salad a while back and just haven't had time to post it. My mom, sister-in-law and myself were planning our meals today for Christmas Eve & Christmas Day and I think this will be a perfect addition to our Christmas Eve Dinner (guess what we are having?) Spaghetti & Garlic Bread (yep, we are SO not traditional)! All the kids will love it and of course we are serving G'ma's Simple Spaghetti.

I do not know the story about this sauce, nor where it came from, nor anything about it! I found it on Pinterest, tried it out and we LOVE it. SO, I don't really mind where it came from I am just glad I found it!


Comeback Sauce on a Wedge Salad
found on Syrup and Biscuits

1 cup mayonnaise
1/4 cup ketchup
1/4 cup chili sauce
1 small tsp Dijon mustard
1 tsp onion powder
1/2 tsp garlic powder
2 tsp Worcestershire sauce
1 tsp ground black pepper
1/4 tsp Tabasco sauce
1/4 cup olive oil
juice of one lemon

Mix all ingredients well and store in refrigerator overnight. It needs to sit to let the flavors mix well.  Makes a pint jar full.


Please Grab Our Button!!!


This Week's Cravings Upcoming Linky "THEMES"
Here is a complete list of the past and what's coming up next on THIS WEEK'S CRAVINGS!
December 26 - Macaroni & Cheese
January 2 - Let's Get Healthy (Healthy Meals & Snacks)

January 9 - Comfort Food (Soups & Casseroles)

January 16 - CHEESE LOVER DAY... any cheese recipe
If you are new here browse around some past weeks at THIS WEEK'S CRAVINGS and you'll see why we are having so much fun and we invite you to link up too. Your hostess for this party are: Tina from MOMS CRAZY COOKING, Angela from Big Bear's Wife, Nicole from The Daily Dish and Kristi from Veggie Converter. We host this theme linky party every Monday (and the party stays open all week long)! We hope to inspire you to make something with our theme or get an old post notice by linking it up to the linky party below.

If you are a regular, link-up we're excited to see what you made this week. Just follow our simple rules, so that everyone can enjoy the linky party! If you forget to follow the theme, your post will be deleted. Please don't feel hurt, just come back and link up a recipe that follows the theme. Thanks a million, we look forward to blogging with you!
The LINKY PARTY is opened ALL Week!

PLEASE do not link more then 3 recipes per week.
This week's theme is: CHRISTMAS DINNER & FOOD TRADITIONS
Please only link recipes with our theme!

This week's theme is: CHRISTMAS DINNER & FOOD TRADITIONS
Please only link recipes with our theme!

Sunday, December 18, 2011

Chocolate Covered Cherry Cookies from GUEST BLOGGER: Secrets from the Cookie Princess

PhotobucketI am so happy to have Colleen from Secrets from the Cookie Princess, here today and a cookie pincess, at that! I make alot of cookies, but I bake too and I make other things. I saw on her blog Holiday Baking Total so far 56 dozen cookies (oh, my sister-in-law would be so happy with me if I made that many cookies! and of course shared them with her). I loved seeing the BAKING GALS logo displayed on her blog. I really love love that organization. If you haven't heard of them I encourage you to check them out. I've now added their logo to my side bar (Thanks Colleen for reminding me what a great thing that is). I baked almost every month for a year for Baking Gals, and then just got out of the habit. I think that's a habit I need to pick up again, soon.


TAKE IT AWAY: 
Happy Holidays! I’m thrilled to be guest posting for Tina at MOMS CRAZY COOKING. My blog is beginning to grow and it’s very exciting to meet all the wonderful bloggers out there willing to help a relatively new kid like me.  I met Tina through the Secret Recipe Club and jumped at the chance when she asked for a guest post. 
I’m Colleen, aka the Cookie Princess behind my blog, Secrets from the Cookie Princess.  I live in New England with my husband and Chief Tasting Office, Dave.  I first started my blog with an original recipe turning an ordinary prepackaged sugar cookie mix into the cookie version of a Cherry Cordial.  That recipe gave my little blog a lot of traction, both in the blogosphere and with my husband who adores the candies.  So what a better fitting tribute to my first guest post, and for the holidays to boot, than to share a Chocolate Covered Cherry cookie with you here! 


I found this recipe at A Good Appetite and it is delectable.  The chocolate is infused with cherry flavor, both in the cookie and the ganache on top and the cherry just bursts when you bite into it.  Dave’s comments upon trying these included, “awesome,” “wicked good,” and “the chocolate goo on top is amazing.”  I like the softness of the rich chocolate cookie paired with the slightly soft ganache and the pop of cherry flavor.  I can’t put my finger on what wasn’t quite right for me, but my dough didn’t really want to come together all the way, so I added a little bit of cherry juice (maybe a 1/2 tablespoon) and that did the trick, plus provided a subtle cherry flavor in the cookie itself.  Otherwise it’s a great recipe and I hope you enjoy.  If you’re looking for more cookies and other desserts and treats for the holidays, I’d love to see you stop by Secrets from the Cookie Princess.

Chocolate Covered Cherry Cookies
recipe originally found at A Good Appetite

1-1/2 cups flour
1/2 cup unsweetened cocoa powder
1/4 teaspoon baking soda
1/4 teaspoon baking powder
1/4 teaspoon salt
1/2 cup butter, softened
1 cup sugar
1 egg
1-1/2 teaspoons vanilla
24 whole maraschino cherries (generally a 10 ounce jar)
1/2 cup semisweet chocolate chips
1/4 cup sweetened condensed milk

In a medium bowl, whisk together the flour, cocoa, baking soda, baking powder and salt.  Set aside. In a stand mixer fitted with a beater attachment, beat butter until smooth, then add sugar and beat until light and fluffy.  Beat in the eggs and vanilla, scraping sides of bowl as needed.

Switch to a paddle attachment and gradually mix in flour/cocoa mixture until combined.  If your dough is crumbly, add a bit of cherry juice from your jar.
Drain the cherries, reserving the juice.  Remove stems if necessary and cut cherries in half.
Roll dough into 1 inch balls or use a small cookie scoop.  Place balls of dough about 2 inches apart on parchment or Silpat lined baking sheets.  Using your finger or thumb, make a small indentation in the center of each cookie.  Place a cherry half in the indentation on each cookie.
In a small saucepan, combine chocolate chips and condensed milk and stir over low heat until melted and smooth.  Remove from heat and stir in 4 teaspoons cherry juice until combined.
Spoon 1/2 to 1 teaspoon of the chocolate over the top of each cherry, covering it completely.  Note: I used a spoon and a spatula to make sure I “painted” over all the bits of the cherry.  If the chocolate is too thick, add a little more cherry juice.
Bake at 350 degrees F for 10 minutes.  Turn baking sheet 180 degrees halfway through. If using more than one sheet at a time, rotate positions in the oven for more even baking.
Remove from oven and let cool on pan for a minute before moving to wire rack to cool completely.
Makes 4 dozen cookies.
Happy Baking and thank you Tina for this fun opportunity!
The Cookie Princess


Saturday, December 17, 2011

Ginger Syrup & Ginger Ale from GUEST BLOGGER: Meg's Everyday Indulgence

Today's second Guest Blogger is a fun young lady who enjoys simple cooking (me too!) and she has a nickname for her son "little man".... SO CUTE! My twins (18 years old now) have always called my son "little boy" (he is now 12 years old and they still call him little boy or little man)!!! And just recently they told his math teacher in Junior High (who was also their math teacher.... to call him "little boy" in class) and she did, and I think he LOVED IT!

Today she is treating you guys to a recipe that never in my wildest dreams would I of ever thought to make! I am SOOOO happy she is sharing this with all of you today! I wish someone would drop a bottle of this off on my porch, because I would LOVE LOVE to try it! :-)


TAKE IT AWAY:  First, I would like to say thanks to Tina for giving me the oppotunity to guest post! My name is Meghan and I blog over at Meg's Everyday Indulgence. I'm a stay-at-home mom to a crazy, silly, funny, undeniably happy 16-month old little man. I started my blog a little over 7 months ago and have loved every minute! I love to post simple recipes using common ingredients that can still wow the crowd. And today's post is no different.

When I saw Joy the Baker's post on homemade ginger ale I almost fell over. Homemade ginger ale? Seriously? Well, it's seriously awesome! It is much spicer then store-bough versions and tastes much more natural. We always have a ginger ale punch (ginger ale and lime sherbet) at the holiday's so this is a great recipe for this time of year. And what a fun gift! Bottle the giner syrup in a pretty bottle then place in a basket with club soda and limes. I love giving and receiving homemade gifts..they are so much more personal and meaningful.

I let my little man give it a try but he wasn't totally convinced. He kept trying and eventually seemed to like it. Please don't judge me... I don't usually let him have soda. It was too funny though.


Ginger Syrup
recipe from Joy the Baker

2 cups coarsely chopped ginger
2 cups granulated sugar
6 cups water


Place chopped ginger in a food processor (or blender in a pinch) and pulverize until well chopped.

Place ginger, sugar, and water in a large stock pot. Bring to a boil, then reduce heat to a simmer and cook for 1 hour to 1 hour and a half, until the liquid has reduced down by more than half. You’re going from 6 cups of liquid to 2 cups. The boiling syrup will become glossy and silky as it cooks down and nears completion.

Remove syrup from the flame and strain twice through a cheese cloth, or fine mesh strainer, into a large bowl. Let syrup cool slightly before pouring into a bottle to store. Cool completely before incorporating into drinks.

Ginger Ale

1 cup club soda
3 tablespoons ginger syrup (or to taste)
lime wedge
dash of bitters (optional)
ice


Combine all ingredients in a glass over ice. Stir with spoon to incorporate. Enjoy immediately.


megseverydayindulgence.wordpress.com

Thanks a Million Meg for coming and sharing this with myself and my readers! I hope someday to make this..... I can't wait to taste the Fresh Ginger Ale! So Excited!!!

Champagne Jelly from GUEST BLOGGER: Hezzi-D's Books and Cooks

I've never made homemade jelly, but it's defiantly on my to-do list. Maybe this holiday season will be my first attempt! I have a friend who makes it every year and I am hoping to jump on board.

I am loving all these guest bloggers here, it is so much fun getting to know new people. Of course I love showing all of you some different recipes and it gives me  some much needed inspiration. Here is Heather from Hezzi-D's Books and Cooks, check out this awesome jelly she made. WELCOME Heather!! 

TAKE IT AWAY:

Hi!  I’m Hezzi-D from Hezzi-D’s Books and Cooks.  My blog is all about my adventures in cooking and reading.  I love to cook and bake and enjoy turning full fat recipes into healthier but still delicious meals.  My love of reading has been with me my entire life and my favorite books to enjoy are mysteries, paranormal, dystopian, and humorous.   I’m so excited to be able to share this easy and delicious recipe for champagne jelly, the perfect holiday food gift,  MOMS CRAZY COOKING readers.

I've been waiting for the holidays to make champagne jelly because not only is it delicious, but it makes for an impressive homemade gift.   I finally found time to make it this past Friday because my husband was out and I was home by myself.  The best part of making it was that half the champagne went into the jelly and I got to drink the other half myself.

This jelly may be the easiest thing I've canned all year simply because there are no fruits to peel or vegetables to dice.  The base of the jelly is made with raspberry juice.  It ended up a beautiful pinkish red color and firmed up quickly.  I love the taste of it as well.  It tastes like raspberries with a slight hint of champagne.  It's delicious on toast in the morning!

Champagne Jelly 
From Ball's Blue Book Guide to Preserving

3 c. bottled raspberry juice
1/4 c. lemon juice
6 T. classic pectin
4 c. sugar
1 1/4 c. champagne

Prepare your canner, lids, and jars.

Combine raspberry juice and lemon juice in a large saucepan.  Stir in the pectin and bring to a boil.  Stir frequently.  Add in the sugar and stir until dissolved.

Boil hard for 1 minute, stirring constantly.  Remove from heat and stir in the champagne.  Skim foam if needed. 

Ladle the jelly into hot jars and remove air bubbles.  Leave 1/4 inch headspace.  Wipe the rims of the jars, put on the lids, and twist the screwbands to fingertip tight.

Process in a boiling water canner for 10 minutes.  Remove and let cool for 12 hours.  Check the seal and store for up to 1 year.

Makes 6 half pints.


Thank you so much Heather! I can't wait to check out all your canning ideas.
You have inspired me, next year will be my year to learn and practice canning! Thanks again!

Friday, December 16, 2011

Hot Cocoa Dippers from GUEST BLOGGER: The Farm Girl

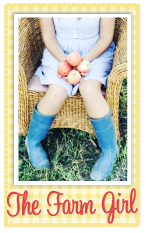
I am just LOVING this recipe from The Farm Girl. I came across her blog some time ago and have been follwoing it ever since. Her recipes always stand out, her pictures are amazing and a few of her recipes have made there way to be featured and/or voted as top recipes on my blog. This is why I am so honored to have her here today guest posting. That picture below is her parents back yard, I am in ah! Just amazing, so beautiful! I can only dream of places like that, I live in Southern California.


TAKE IT AWAY:   I am so excited to be here at MOMS CRAZY COOKING!  Thanks Tina for having me come over.

I am Julie from The Farm Girl Recipes.  I am a tried and true daughter of a third generation farmer.  I grew up in the "wilds" of Idaho and absolutely loved being in the middle of nowhere.  That photo up there is the view from my parents back door--so beautiful to me.  Somewhere along the way, I discovered that I loved to cook and bake.  The big joke in my house growing up was that Julie could cook anything except boxed mac-n-cheese.  It's true--I just couldn't get it right!!!  It's probably because I can't stand the stuff, and how can I cook something I don't like? 

Anyways...growing up, my mom really helped me discover the joys of cooking and baking. I learned to love to make yummy food for other people and help them discover the joy it is to taste great food.  That's why I created my blog--to share the joy of the kitchen with others and to help them learn how much fun it is to cook and bake.

I now how 4 wonderful children, 2 boys and 2 girls and an awesome husband who is so supportive of all the new recipes I am constantly trying--even when they turn out not so great--because believe it or not, all great cooks have some colossal screw-ups.  Trust me!  


Now that it's so close to Christmas we have been in full swing at our house.  One of the things we love to do this time of year is give out treats to our neighbors.  

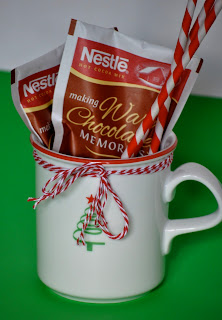
I am always looking for something new to share with them.  This is what we are giving this year--hot cocoa dippers.  I had my children try them and they were in love.  They thought it was so fun to have something cute to stir into their chocolate, plus I love the little zing of flavor the mint gives it.


It will be so cute packaged in a clear bag with some dippers, hot chocolate, and tied with Christmas  string.  Perfect for a cold winter night.

These beauties can be made many different ways.  I used crushed candy canes, Andes mint chips, and red sugar flakes.  You can also use red sprinkles.  Feel free to use your imagination and experiment.  


Hot Cocoa Dippers
Source: idea from Good House Keeping

Large marshmallows
Drinking straws ( I got mine at Garnish)
Chocolate (I used chocolate candy melts)
Toppings: crushed candy canes, Andes mint chips, red sugar sprinkles, or red nonpareil sprinkles

Spread out wax paper on a flat surface.  Skewer marshmallows on straws, making sure to not go through the end. Melt chocolate in a small microwave-safe bowl, according to package directions. Dip in marshmallows, leaving white tops exposed; lift sticks straight up, letting excess chocolate drip off. Add toppings and let cool completely on wax paper.  Package for your neighbors or make yourself some cocoa and add your dipper.  Enjoy!


I would love you to come over and visit and I hope you have a wonderful Christmas season!

The Farm Girl Recipes

Thank You, Thank You Julie!
Doesn't this picture just make you SMILE? Please hop on over and say hello to The Farm Girl, I am sure you will find a ton of recipes you can't resist. Tell her you found her here at MOMS CRAZY COOKING! I am really hoping and praying that I get to make these dippers this year! So many things to make, so little time and not enough people to eat them all! Happy Christmas Baking!
Related Posts Plugin for WordPress, Blogger...